Designing for a Better Future
About ME
This portfolio brings together the projects I’ve created while studying at Wesleyan, where I’ve explored everything from product and mechanical design to drawing, photography, and structural engineering. Each class has pushed me to try new tools, experiment with ideas, and solve problems in different ways. I’m endlessly curious about how things work — and how they can work better — so every project is part learning experience, part creative adventure.

FROM THE PORTFOLIO
CODES Courses
IDEA 160 – Product Design I
IDEA 170 – Mechanical Design & Engineering
ARST 131 – Drawing I
IDEA 292 – Interdisciplinary Project Lab
IDEA 370 – Product Design II
IDEA 160
Product Design I & Design Lab
Details
xxx

xxx
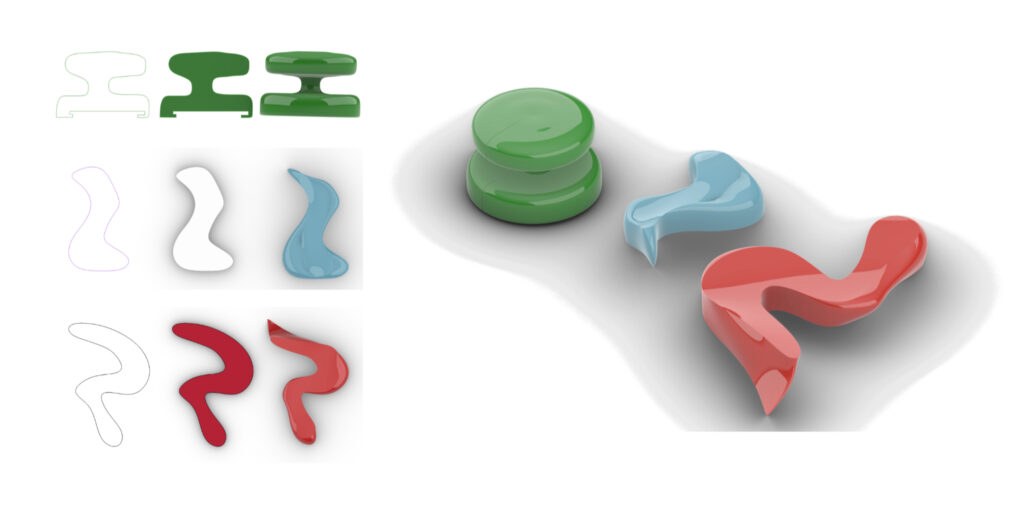
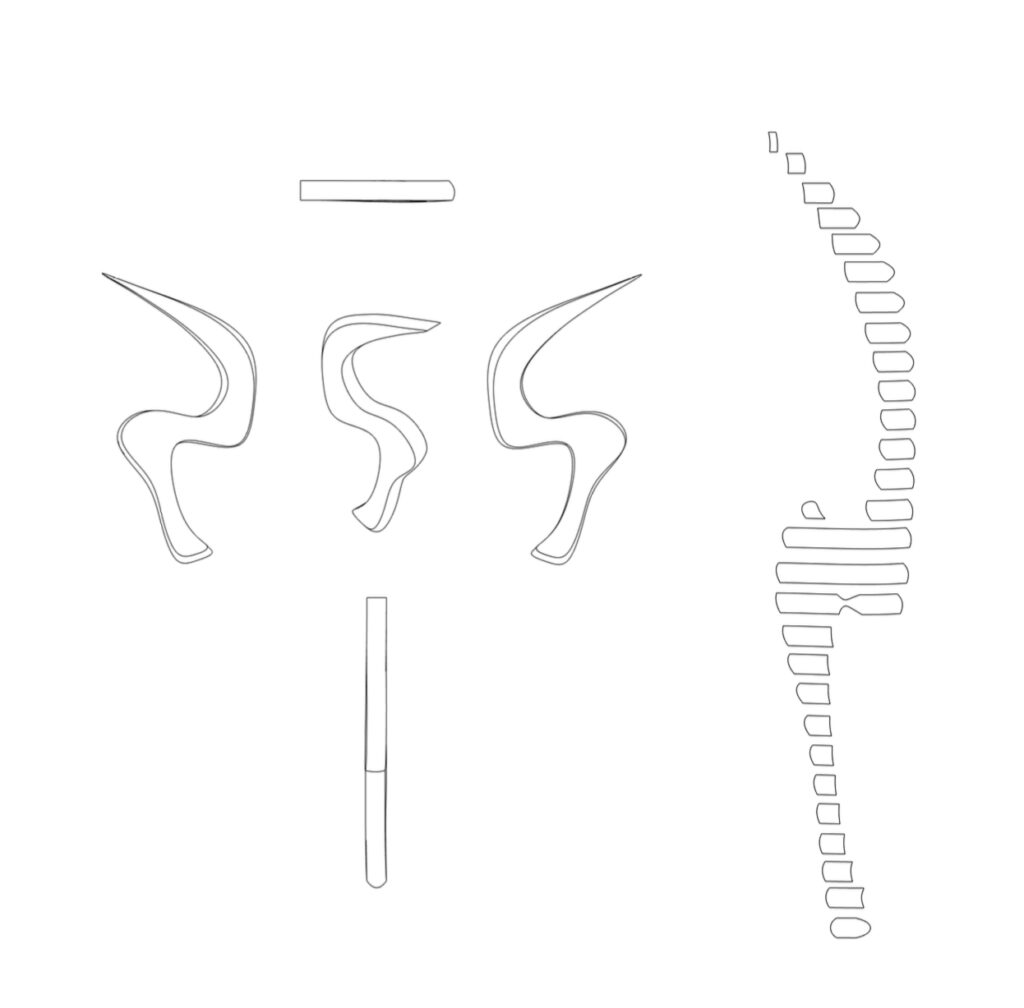
Curvilinear & Rectilinear Forms


xxx
xxx

Digital Prototyping
xxx

xxx

xxx

xxx
xxx
IDEA 170
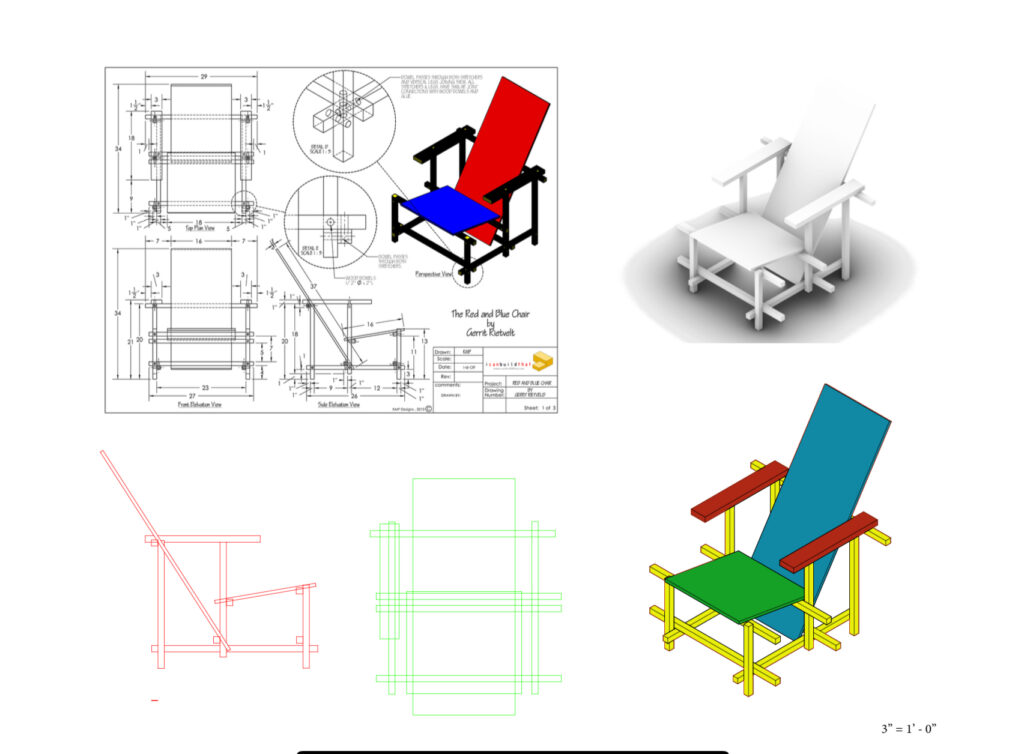
Mechanical Design & Engineering

xxx
xxx

xxx
xxx
xxx
xxx
ARST 131
Drawing I
IDEA 292
Interdisciplinary Project Lab
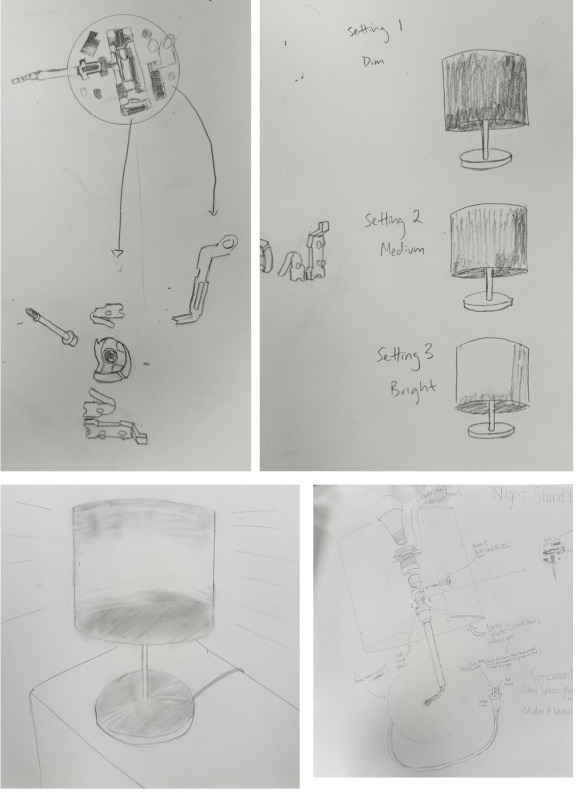
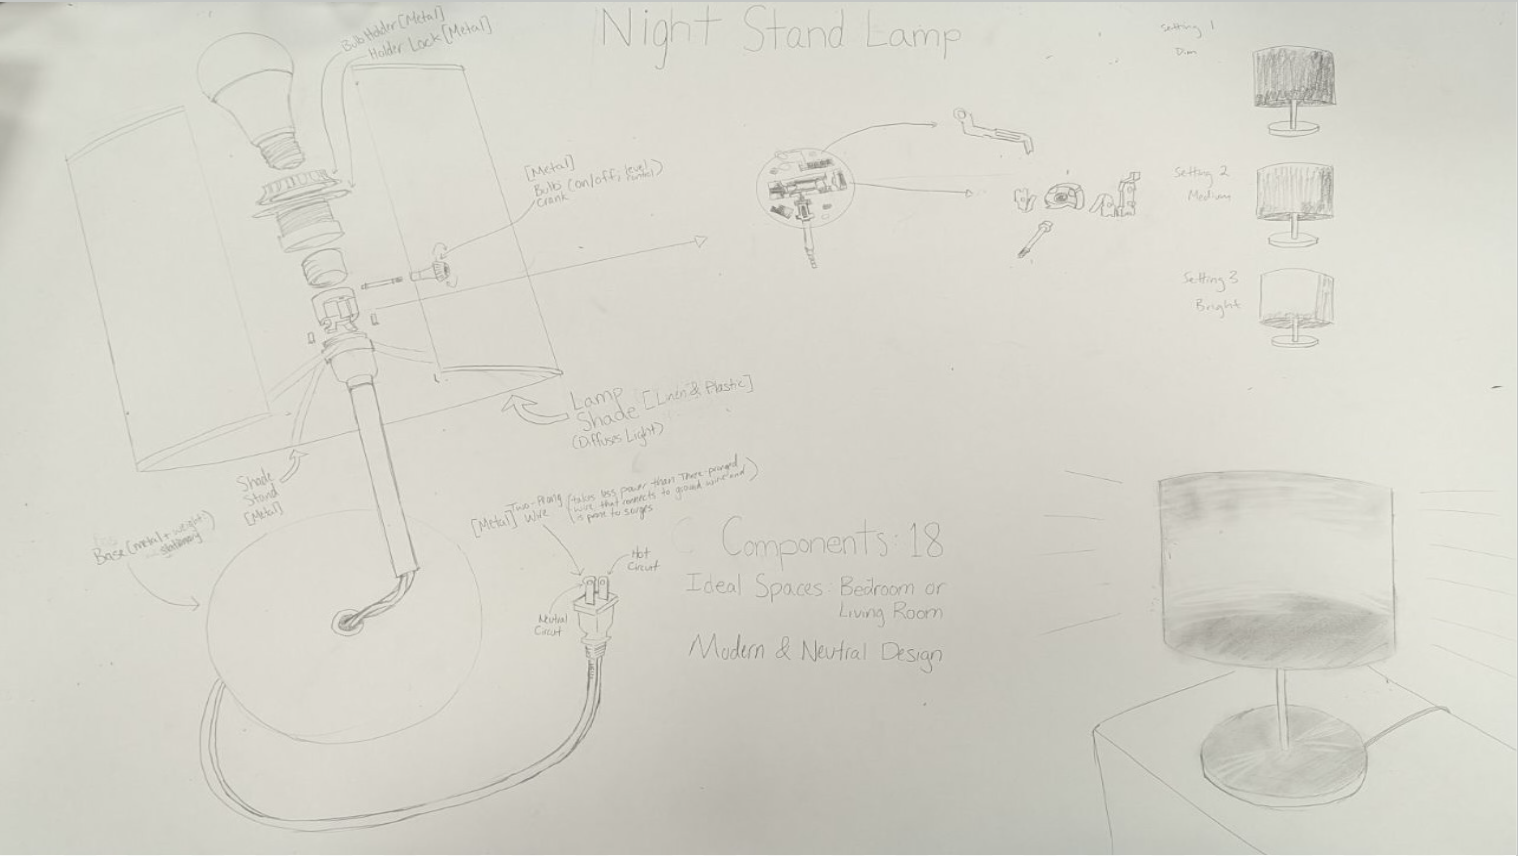
Lamp Dissection Analysis
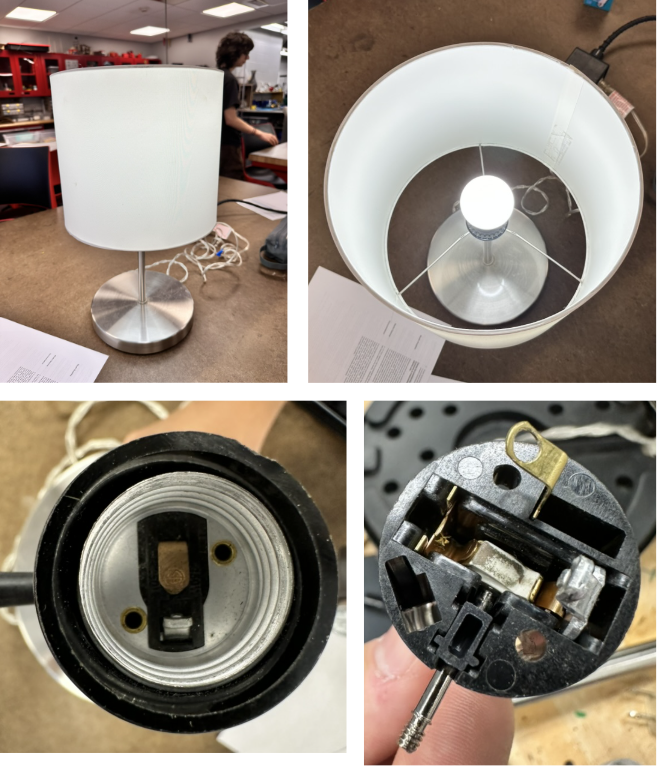
After dissecting and analyzing the components of this shade, we were able to observe the complexities of this more analog version of lamp from the 20th century. Seeing the intentions of limiting the bulb’s brightness and the shade diffusing the light to create a nice, gentile light source.
After analyzing the components of the lamp, we sketched out each individual piece and were able to piece together where and why each were assembled the way they were. Additionally, we discovered the context this lamp is intended to fit into.
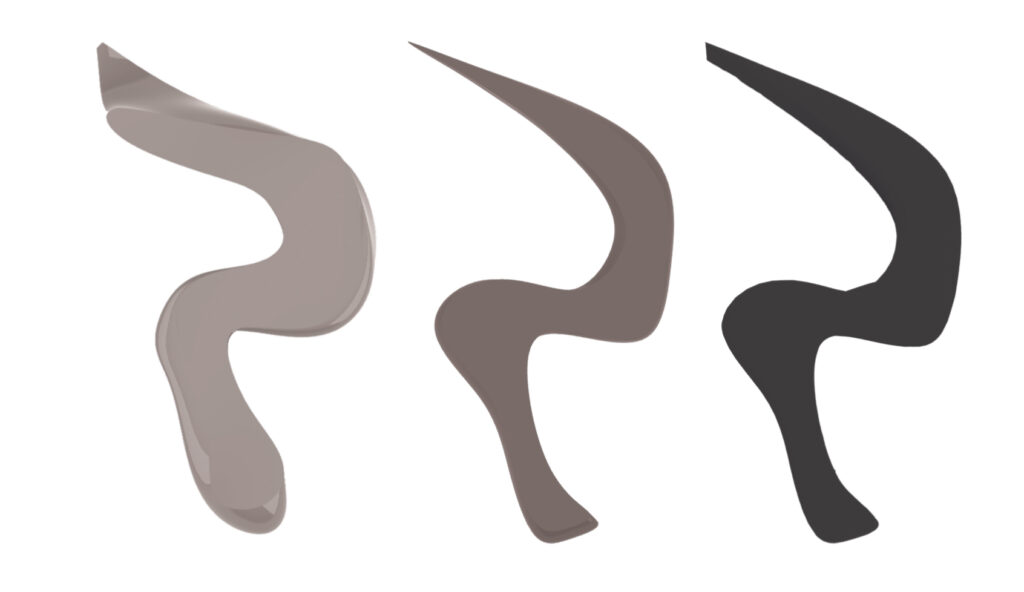
The Empire Shade

With the initial goal of developing a lampshade inspired by New York architecture, I decided to design my own take on the rockefeller, chrysler building-style empire symbol. Using this torch-like design and folds to pay homage to my hometown.
Using Adobe Illustrator, I took the challenges and flaws of the previous designa and altered them to be more unified and standard, with a focus on simplicity and cohesion.

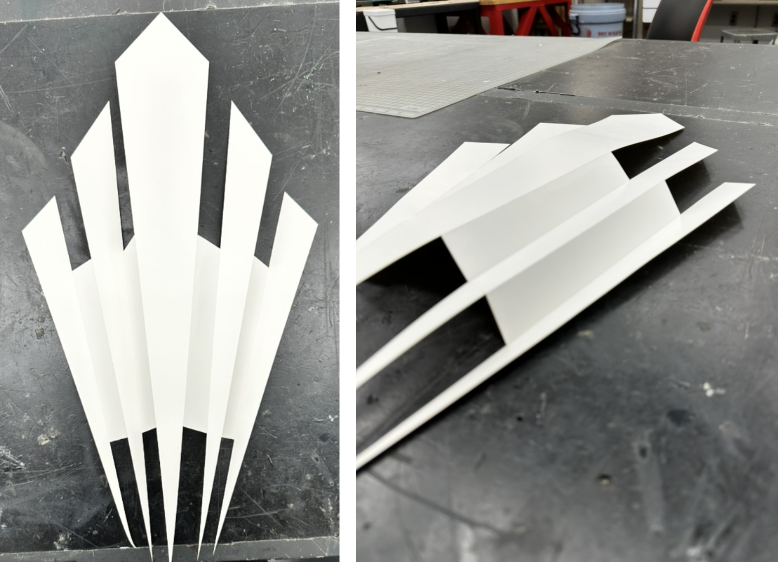
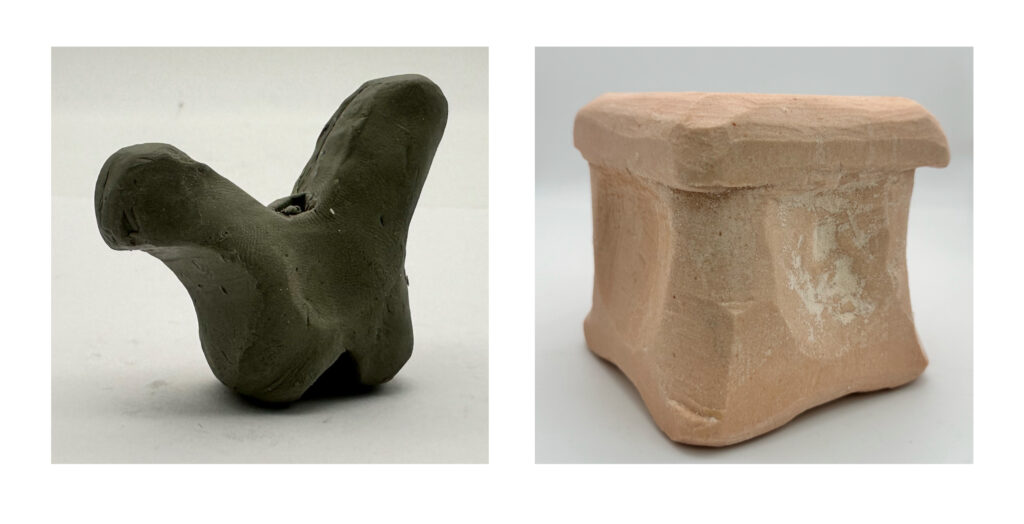
After finalizing the shade’s overall design, it was time to bend the folds and realize the depth and character of this project. By folding the edges, the empire style truly came through and the pop of the project started to be realized.
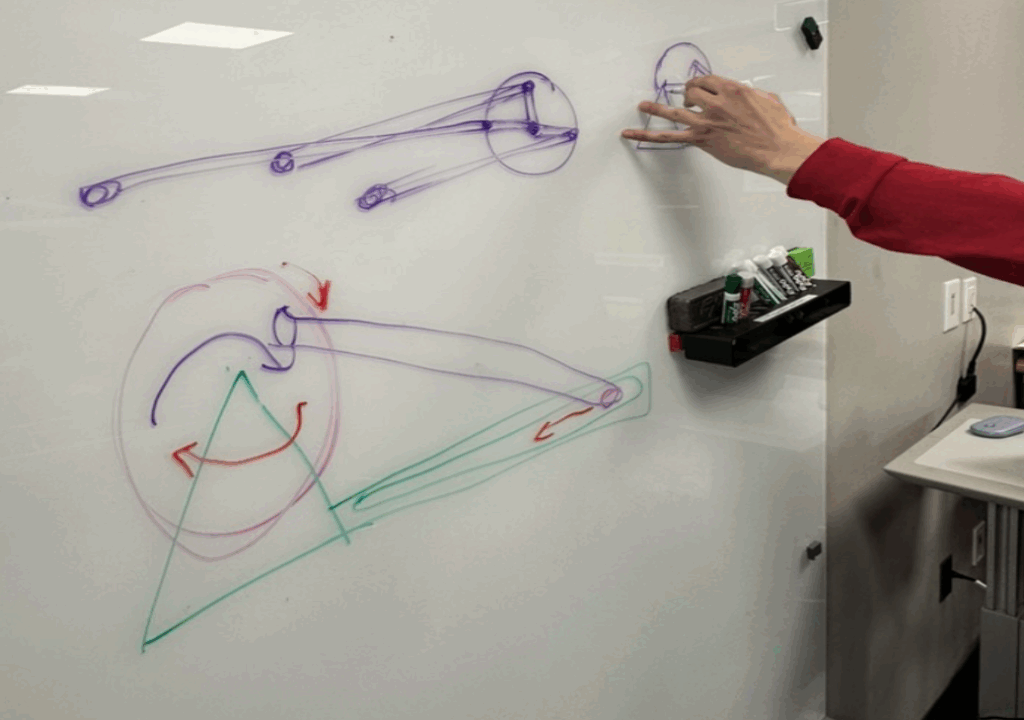
With the folds and designs finalized, it is time to assembly and place the shade on the board to test out the interaction between the shade and the bulb in the hope to identify issues with light diffusion between my intentions and the realized design.
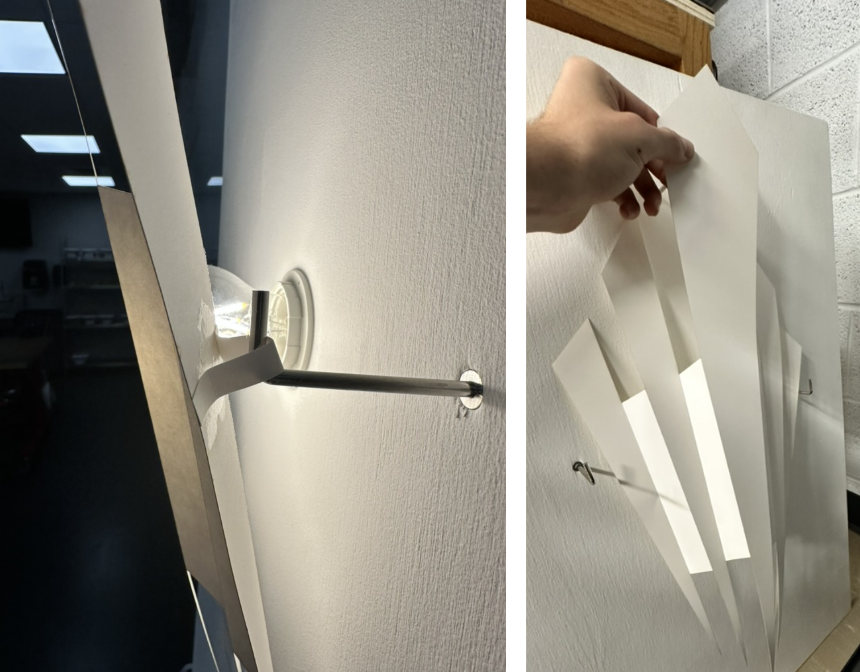
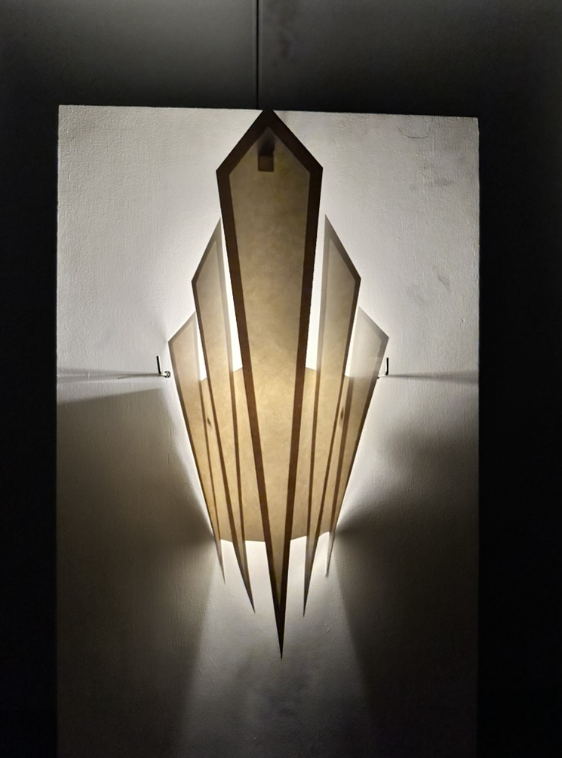
After finalizing the assembly and mounting components, the empire shade successfully manipulated the diffusion of the bulb’s light: blocking the direct light, guiding concentrated light downwards, and allowing light to be sent freely upwards.
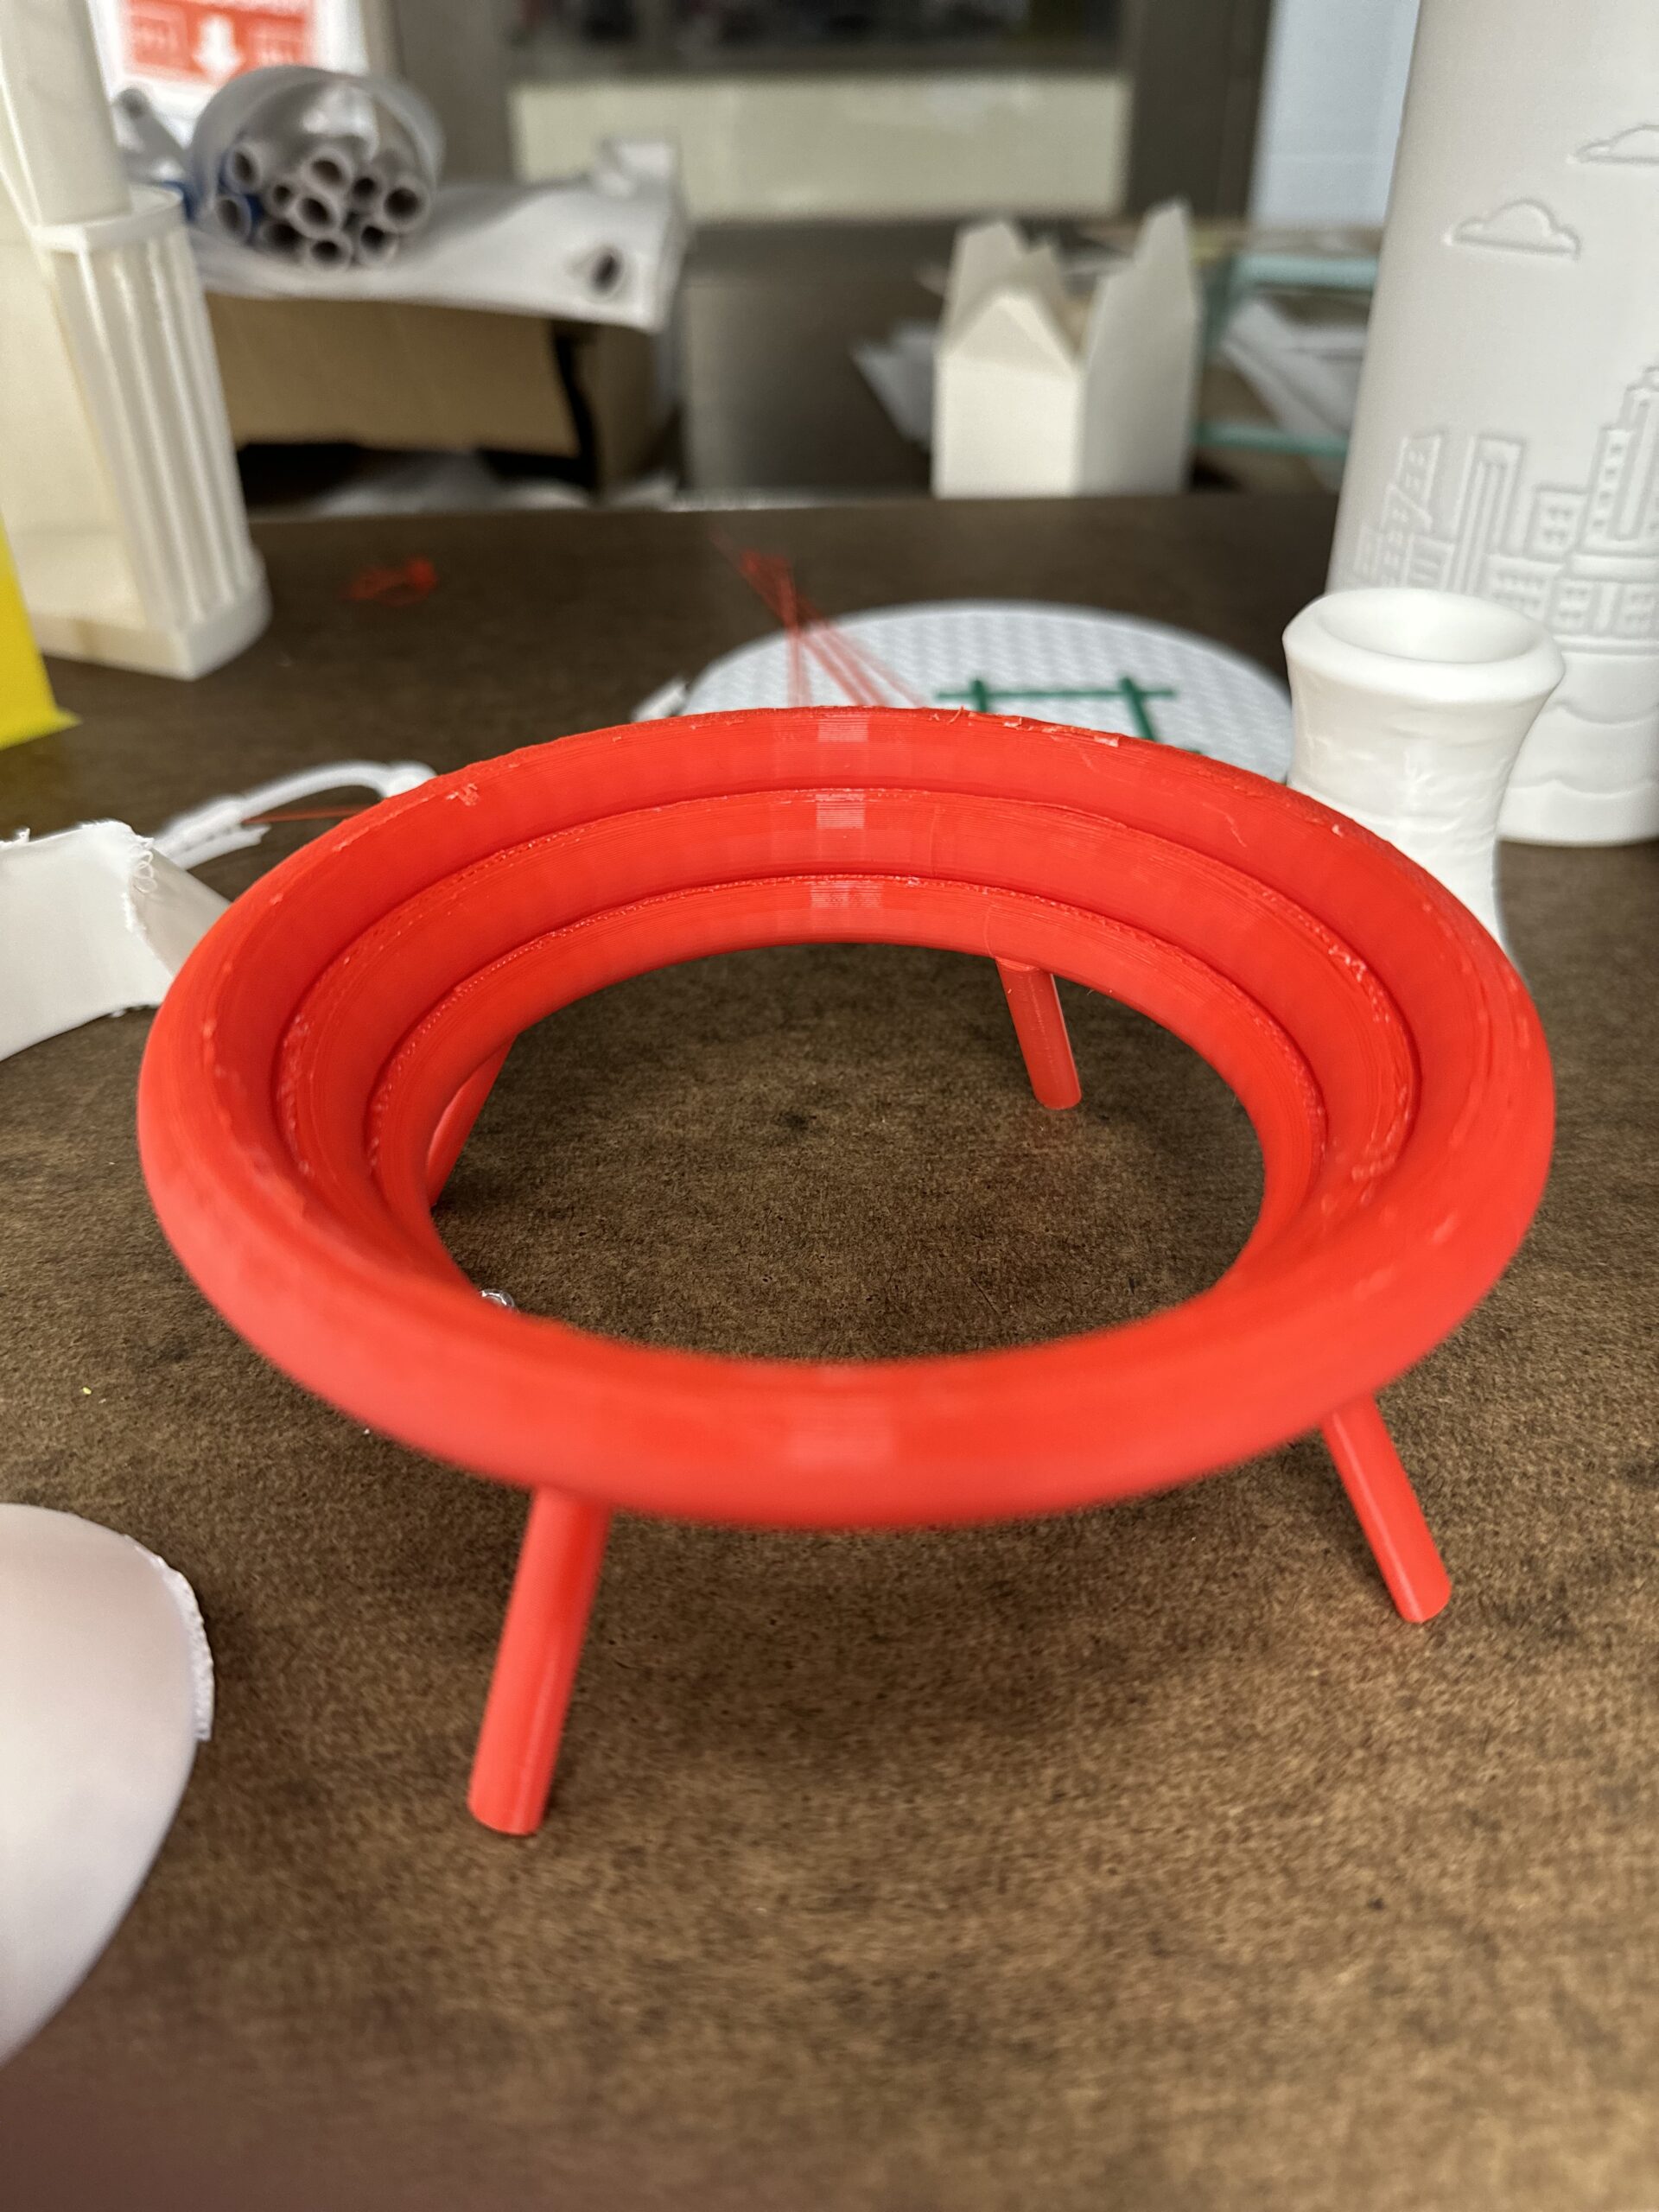
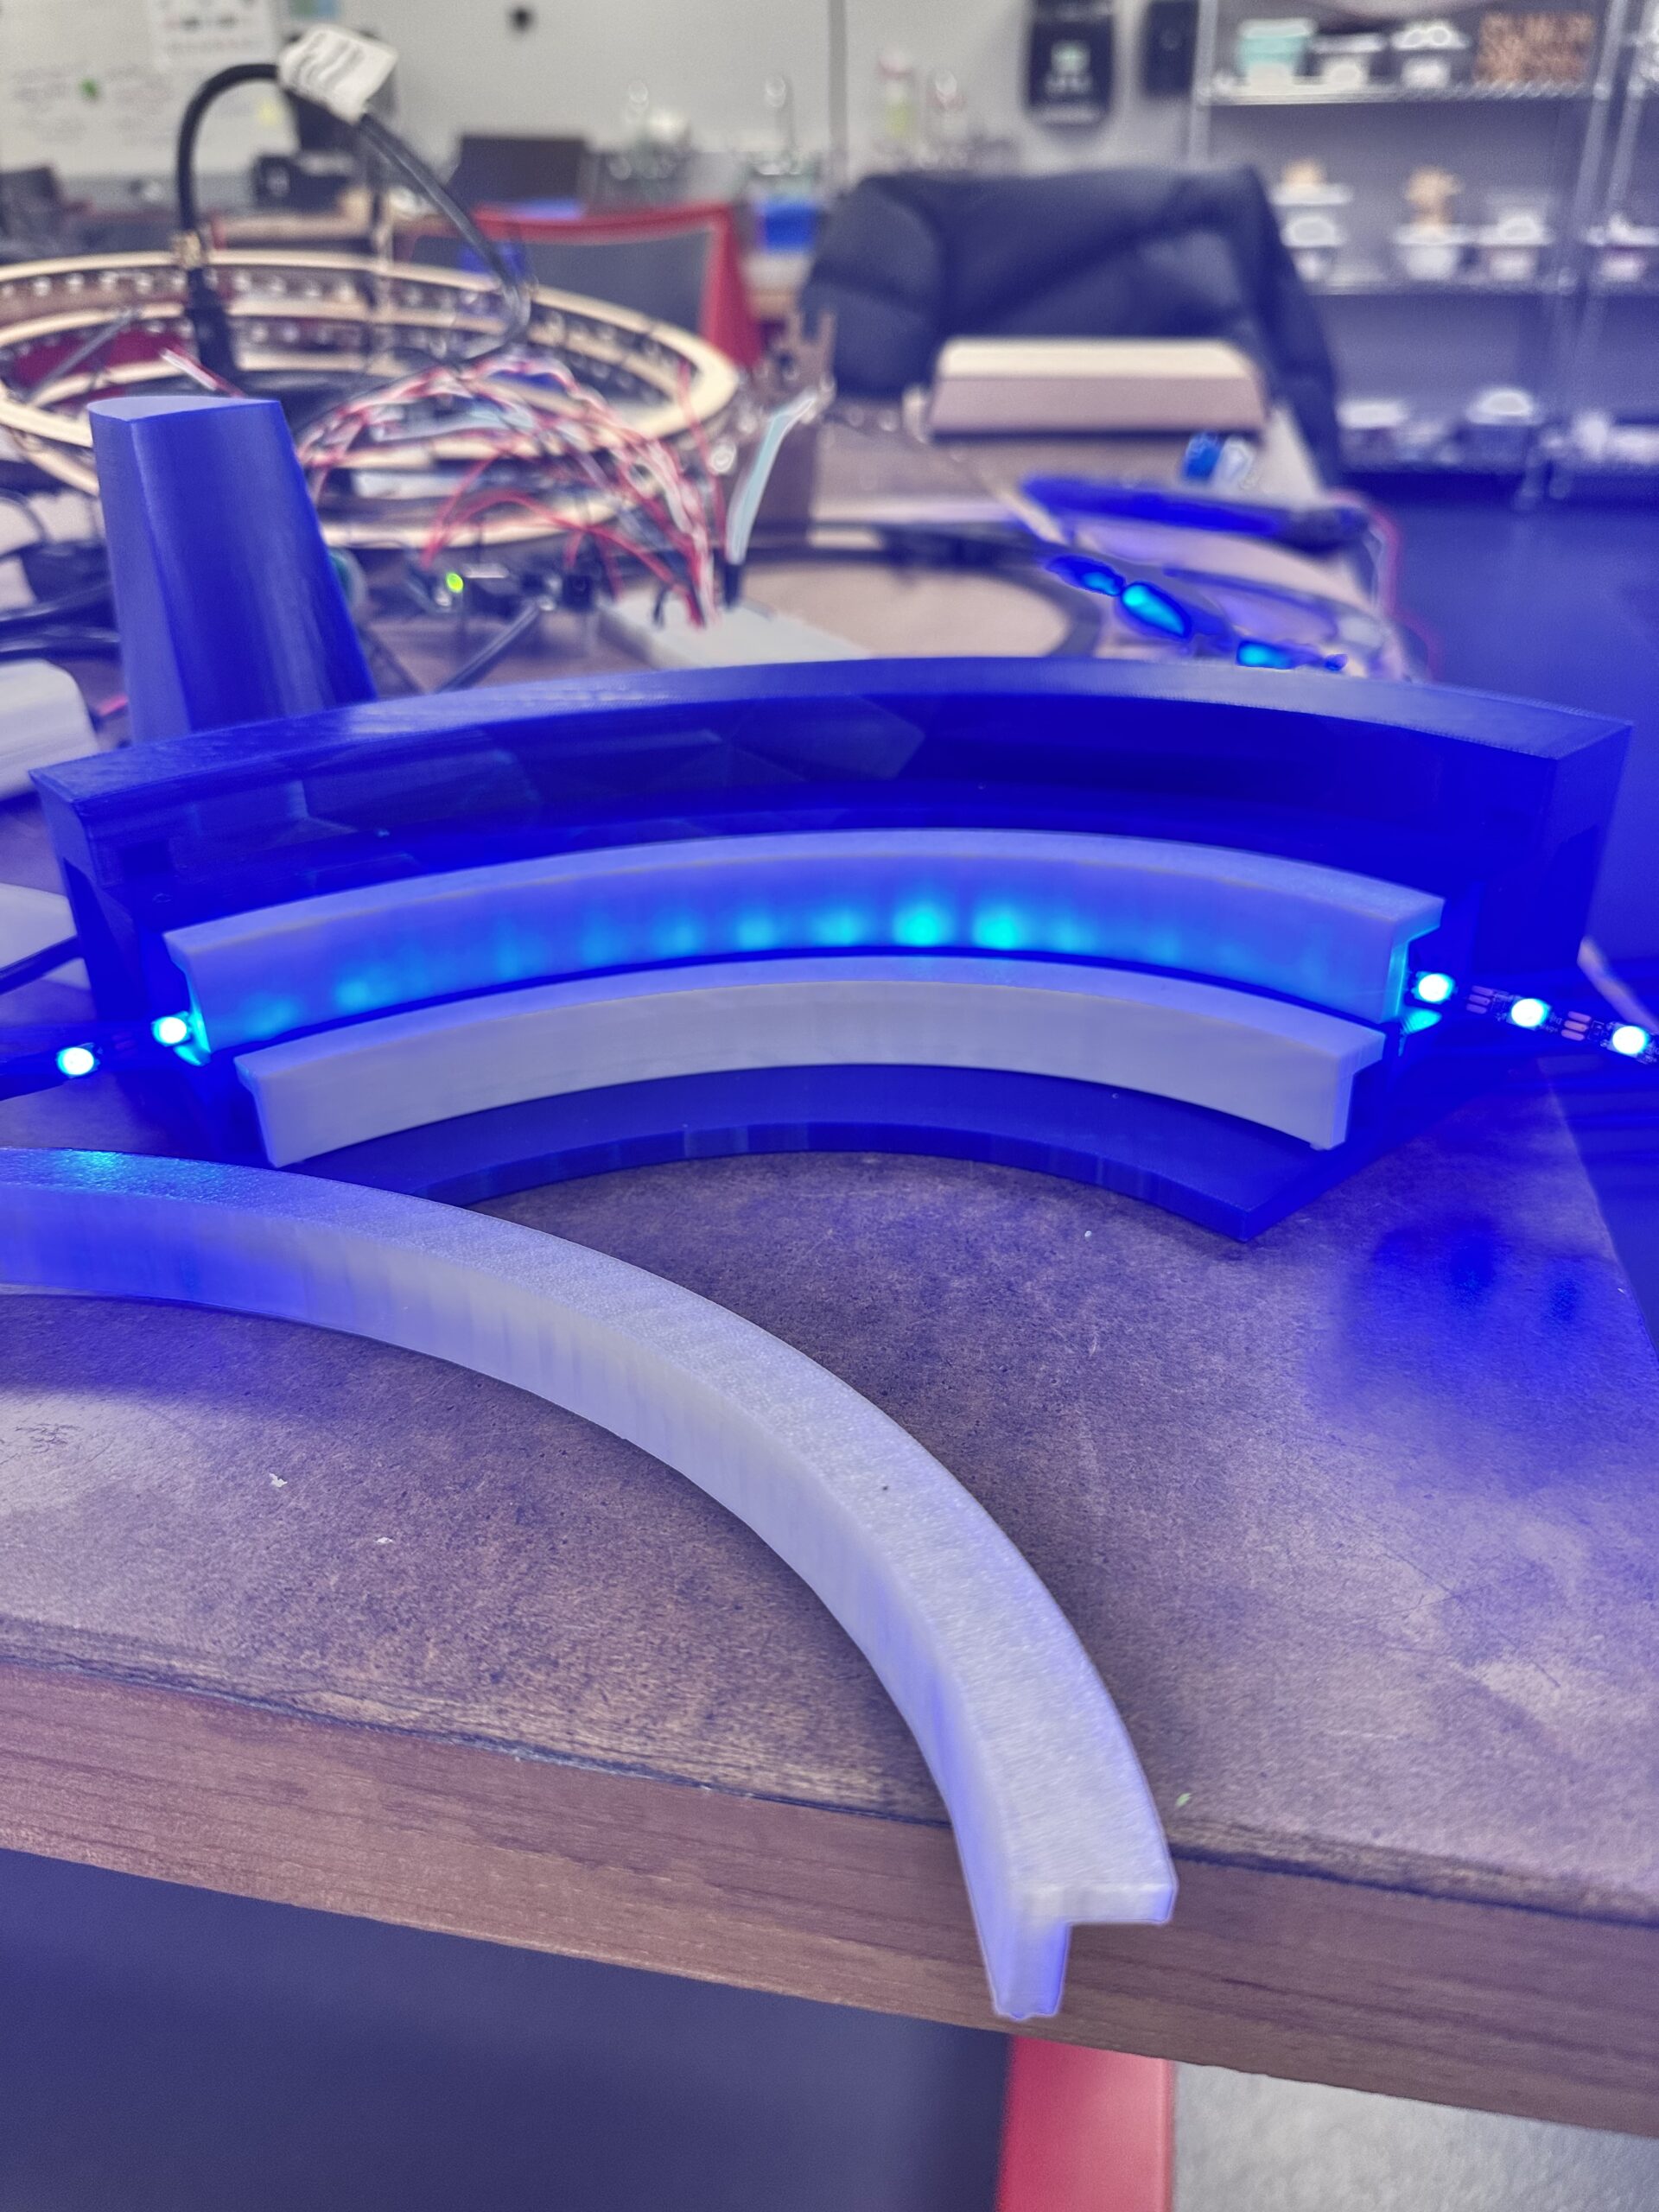
Lithophane Lighting System

Using Solidworks, I used the tools to design my unique trophy-like shade and the traces of the circuit board.
Using the CNC router, I carved out the pocket and traces for the lithophane light base and circuit board. And using sauder, I was able to install wiring, LEDs, resistors, and the dimmer.


After designing the shade in solidworks and mapping out my design, I sent this design to the 3D printers to fabricate.
After 3D printing the shade and additional base, I connected the light switch and assembled all components to create my final lithophane lighting system.


Final Illumination
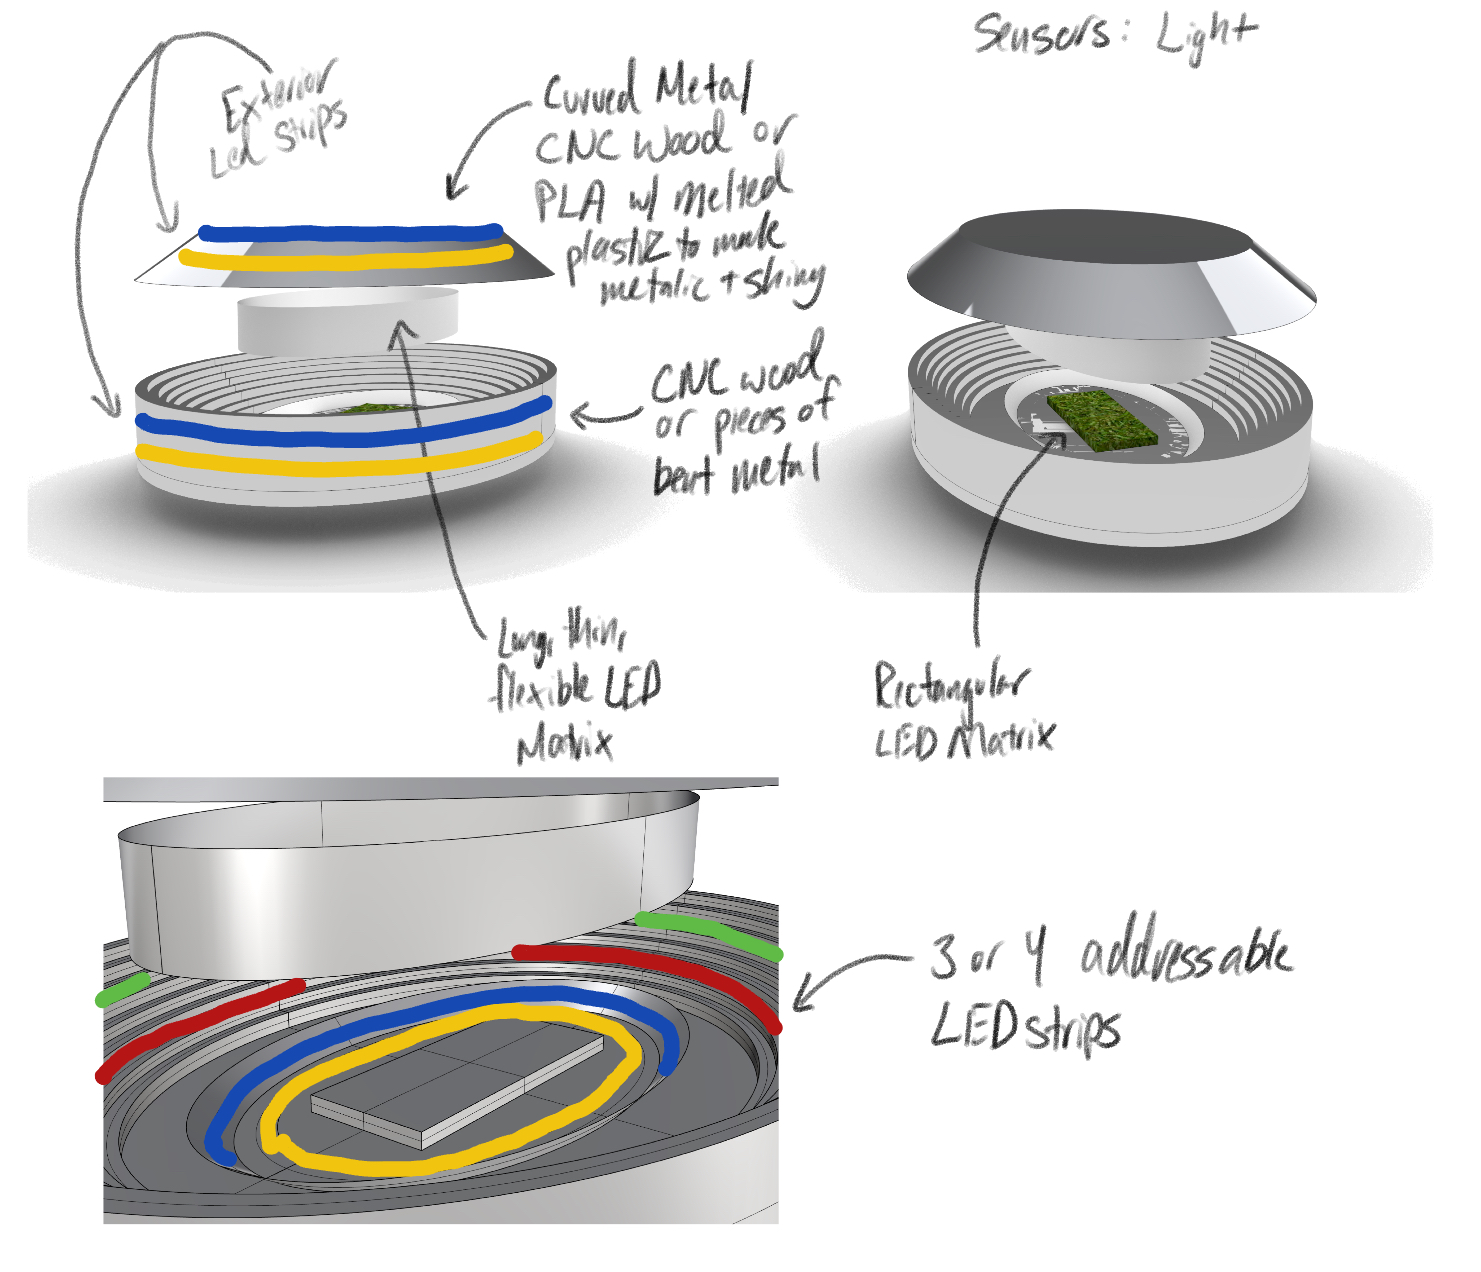
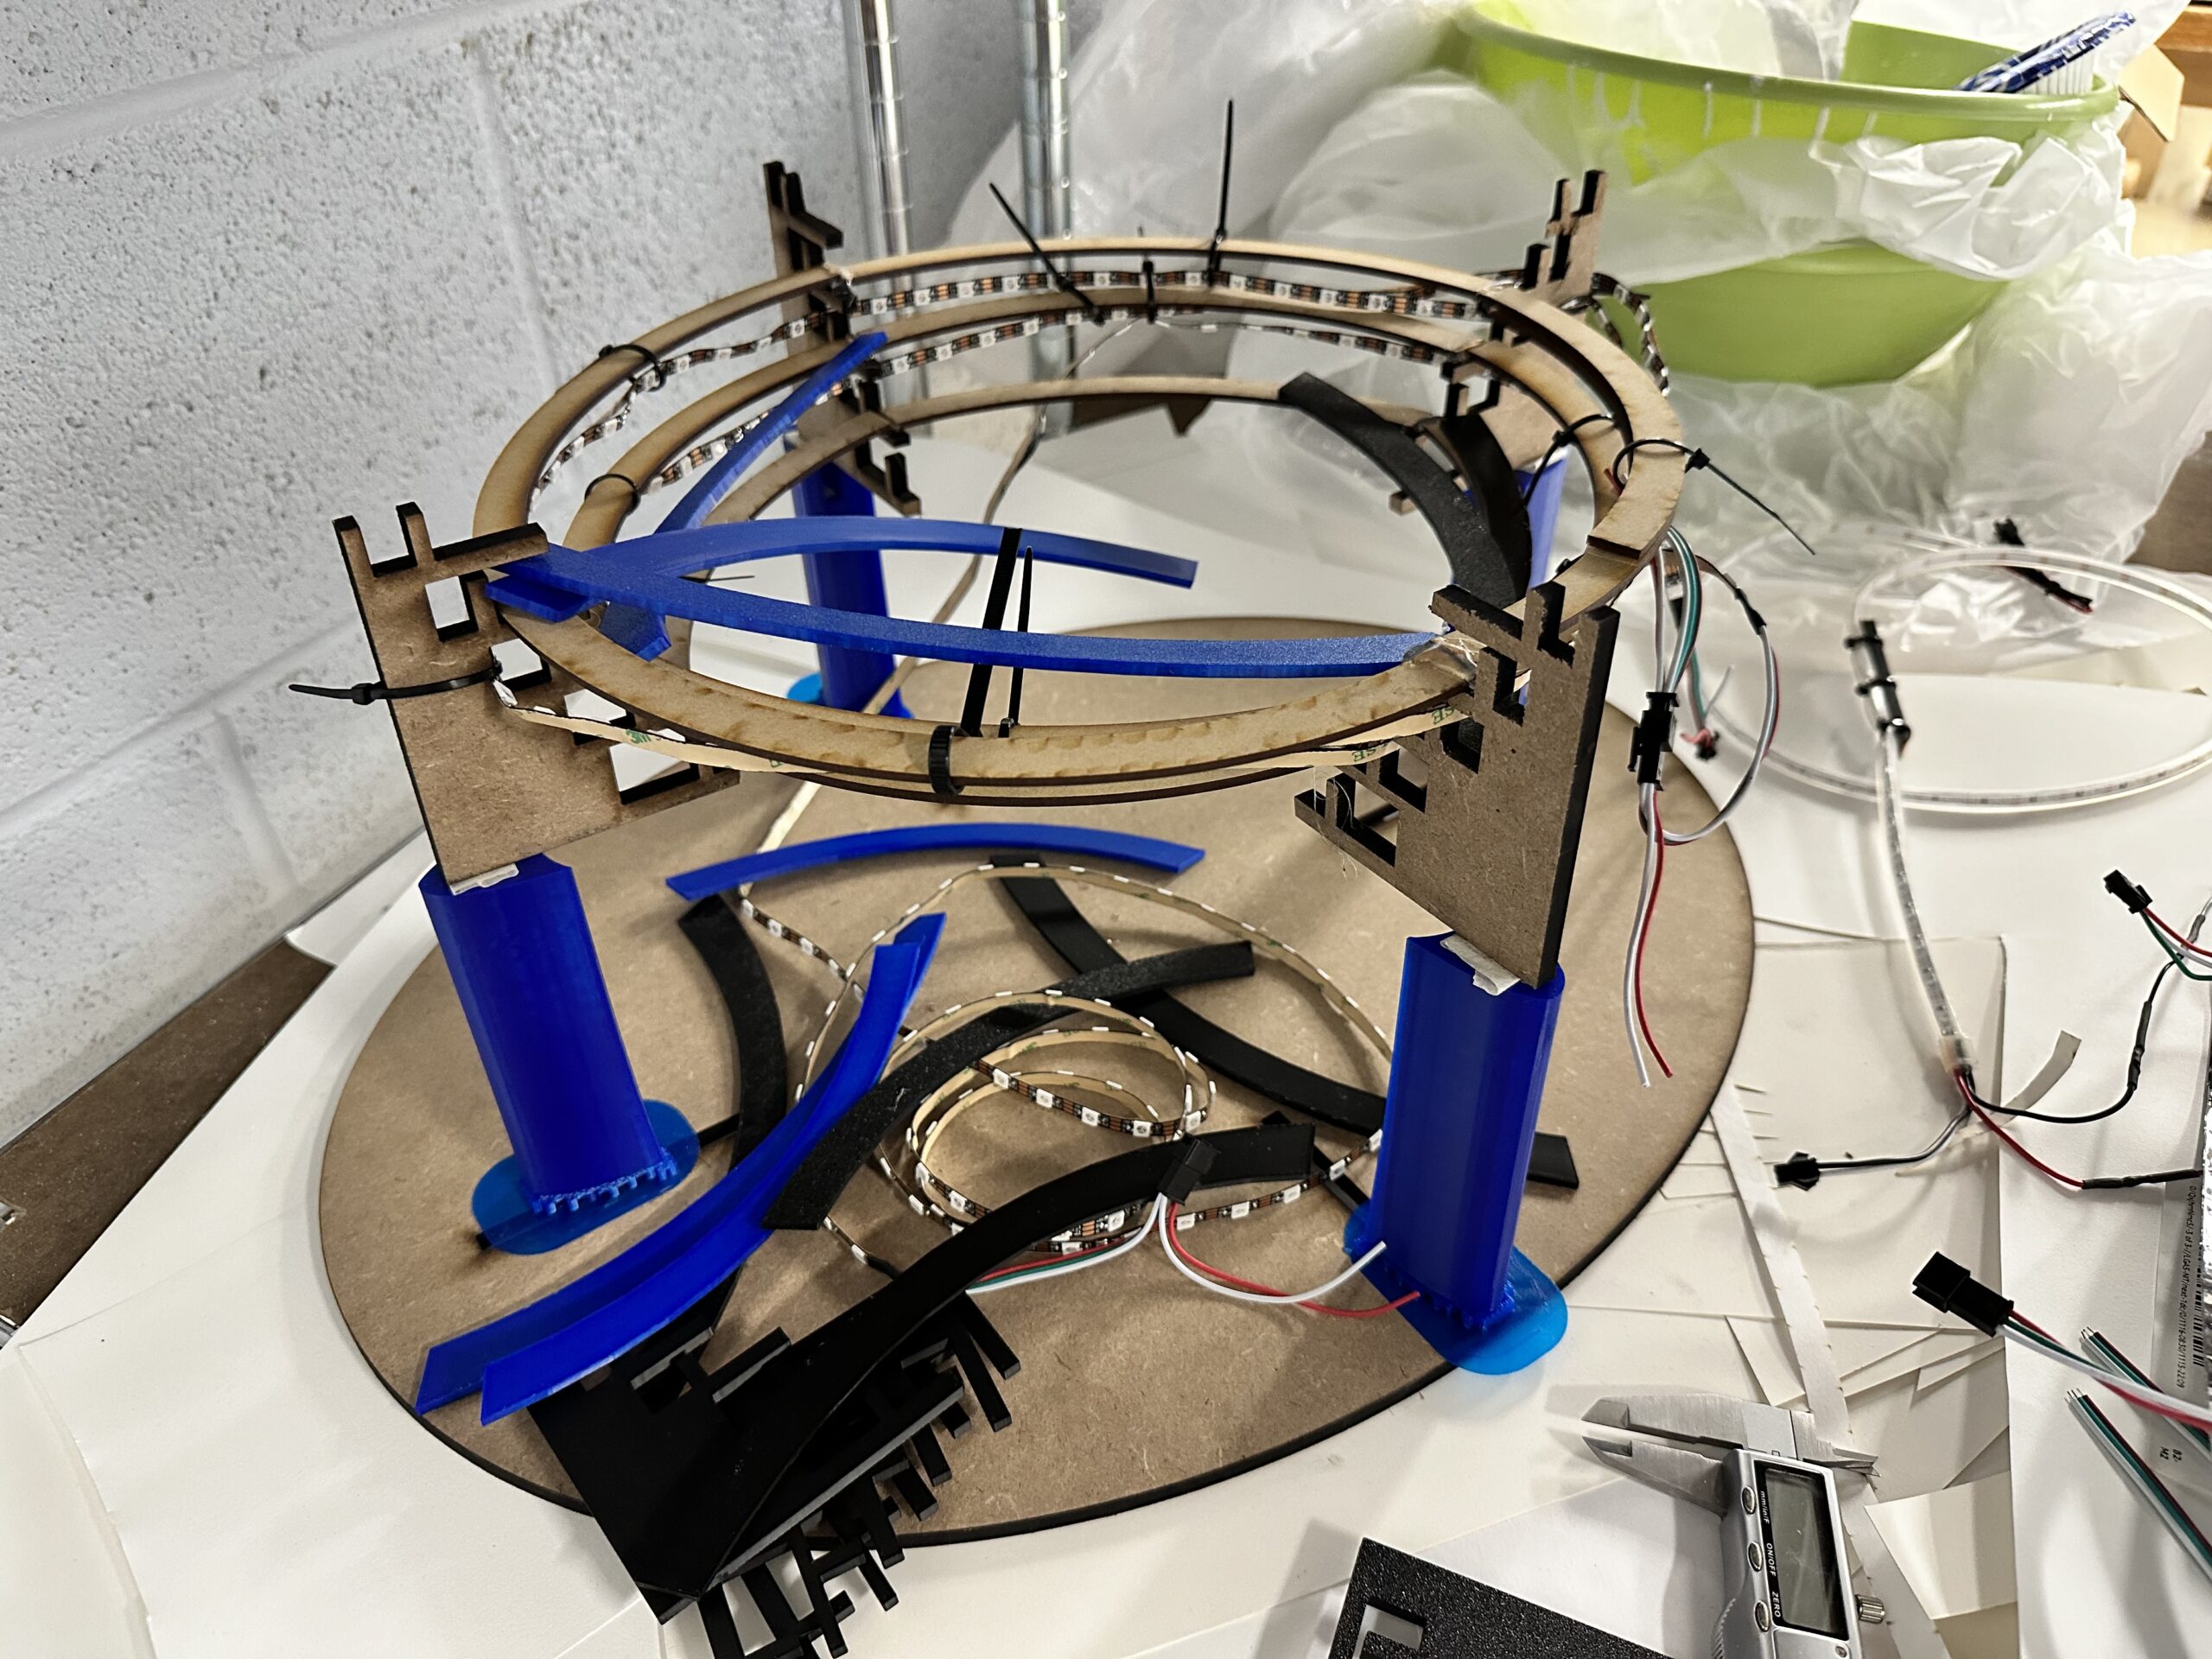
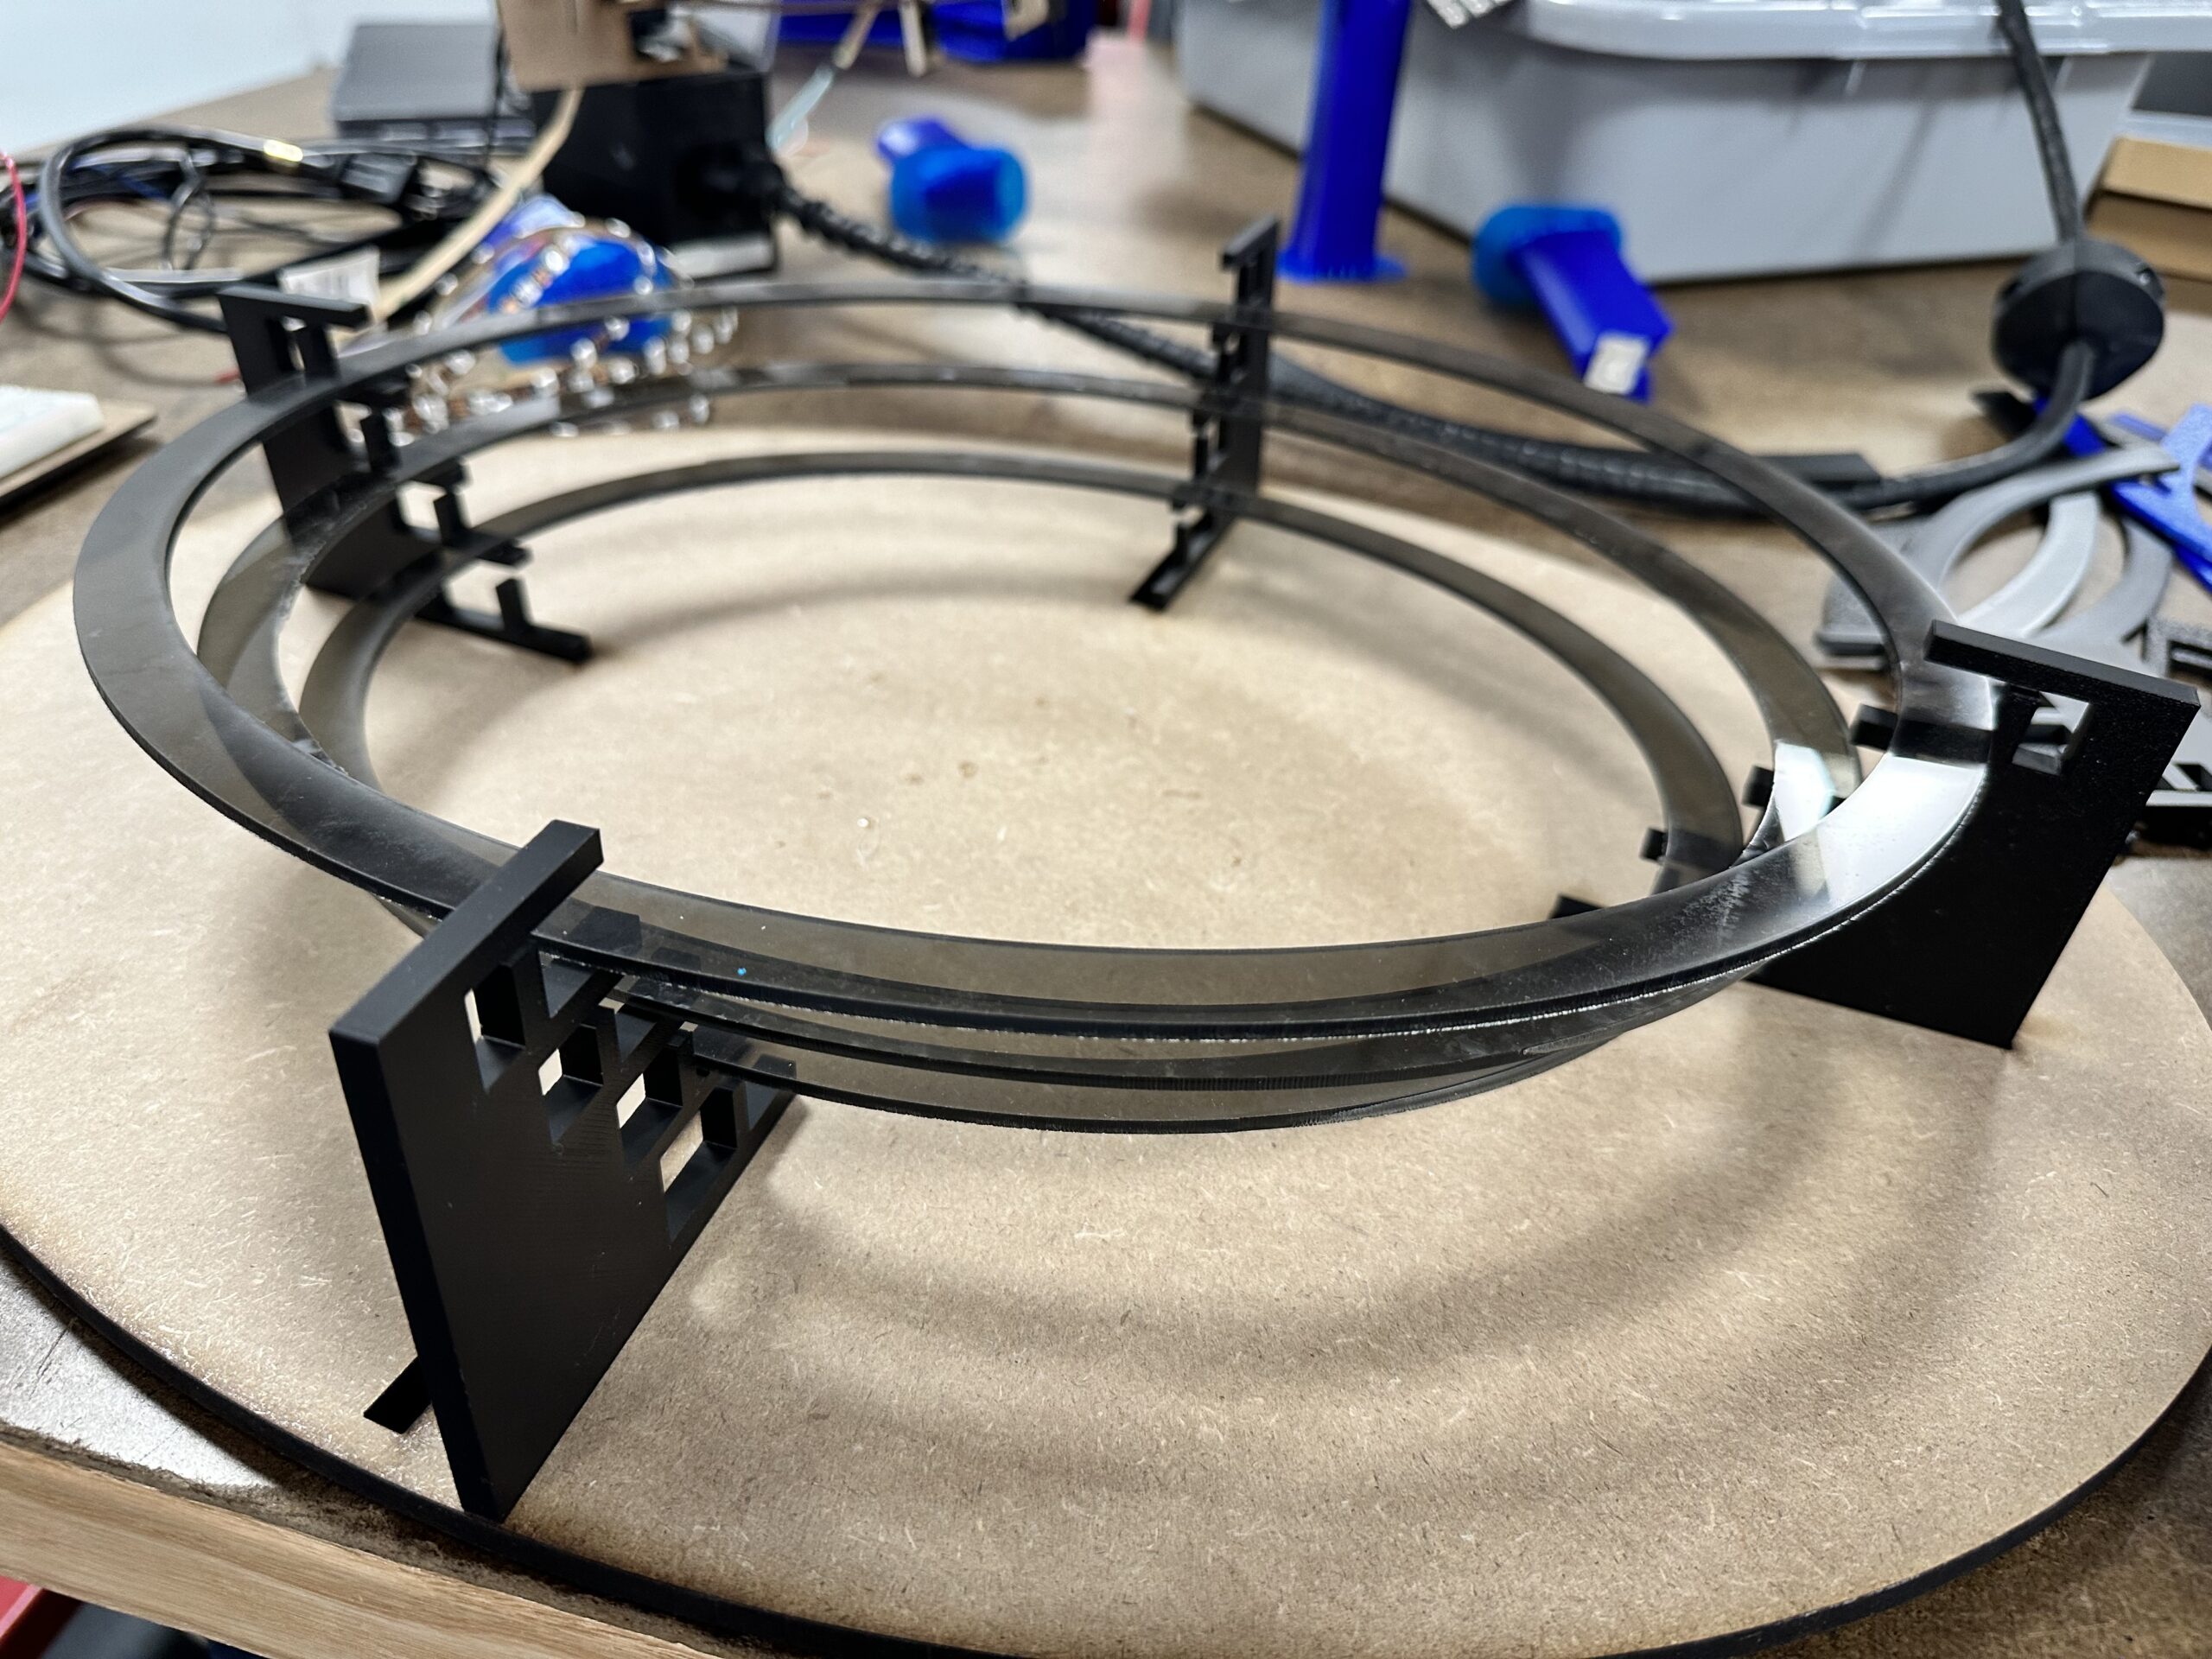
LED Stadium

IDEA 370
Product Design II